8.4.1 Android动画合集之帧动画
本节引言:
从本节开始我们来探究Android中的动画,毕竟在APP中添加上一些动画,会让我们的应用变得 很炫,比如最简单的关开Activity,当然自定义控件动画肯定必不可少啦~而Android中的动画 分为三大类,逐帧动画(Frame)以及补间动画(Tween),还有Android 3.0以后引入的属性动画 (Property),而本节给大家带来的是第一种动画——逐帧动画的一个基本使用~
1.帧动画概念以及用法
帧动画非常容易理解,其实就是简单的由N张静态图片收集起来,然后我们通过控制依次显示 这些图片,因为人眼"视觉残留"的原因,会让我们造成动画的"错觉",跟放电影的原理一样!
而Android中实现帧动画,一般我们会用到前面讲解到的一个Drawable:AnimationDrawable 先编写好Drawable,然后代码中调用start()以及stop()开始或停止播放动画~
当然我们也可以在Java代码中创建逐帧动画,创建AnimationDrawable对象,然后调用 addFrame(Drawable frame,int duration)向动画中添加帧,接着调用start()和stop()而已~
下面我们来写两个例子体会下帧动画的效果以及熟悉下用法
2.使用示例:
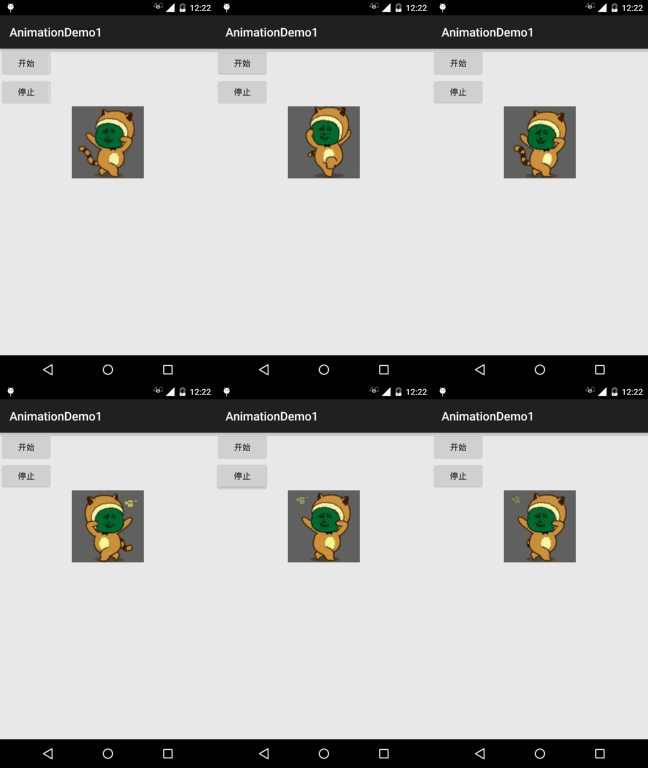
示例一:最简单的例子:
运行效果图:
代码实现:
首先编写我们的动画文件,非常简单,先在res下创建一个anim目录,接着开始撸我们的 动画文件:miao_gif.xml: 这里的android:oneshot是设置动画是否只是播放一次,true只播放一次,false循环播放!
<?xml version="1.0" encoding="utf-8"?>
<animation-list xmlns:android="http://schemas.android.com/apk/res/android"
    android:oneshot="false">
    <item
        android:drawable="@mipmap/img_miao1"
        android:duration="80" />
    <item
        android:drawable="@mipmap/img_miao2"
        android:duration="80" />
    <item
        android:drawable="@mipmap/img_miao3"
        android:duration="80" />
    <!--限于篇幅,省略其他item,自己补上-->
    ...
</animation-list>
动画文件有了,接着到我们的布局文件:activity_main.xml:
<LinearLayout xmlns:android="http://schemas.android.com/apk/res/android"
    android:layout_width="match_parent"
    android:layout_height="match_parent"
    android:orientation="vertical">

    <Button
        android:id="@+id/btn_start"
        android:layout_width="wrap_content"
        android:layout_height="wrap_content"
        android:text="开始" />

    <Button
        android:id="@+id/btn_stop"
        android:layout_width="wrap_content"
        android:layout_height="wrap_content"
        android:text="停止" />

    <ImageView
        android:id="@+id/img_show"
        android:layout_width="120dp"
        android:layout_height="120dp"
        android:layout_gravity="center"
        android:background="@anim/miao_gif" />

</LinearLayout>
最后是我们的MainActivity.java,这里在这里控制动画的开始以及暂停:
public class MainActivity extends AppCompatActivity implements View.OnClickListener {

    private Button btn_start;
    private Button btn_stop;
    private ImageView img_show;
    private AnimationDrawable anim;

    @Override
    protected void onCreate(Bundle savedInstanceState) {
        super.onCreate(savedInstanceState);
        setContentView(R.layout.activity_main);
        bindViews();
        anim = (AnimationDrawable) img_show.getBackground();
    }

    private void bindViews() {
        btn_start = (Button) findViewById(R.id.btn_start);
        btn_stop = (Button) findViewById(R.id.btn_stop);
        img_show = (ImageView) findViewById(R.id.img_show);
        btn_start.setOnClickListener(this);
        btn_stop.setOnClickListener(this);
    }

    @Override
    public void onClick(View v) {
        switch (v.getId()) {
            case R.id.btn_start:
                anim.start();
                break;
            case R.id.btn_stop:
                anim.stop();
                break;
        }
    }
}
好的,非常的简单哈~
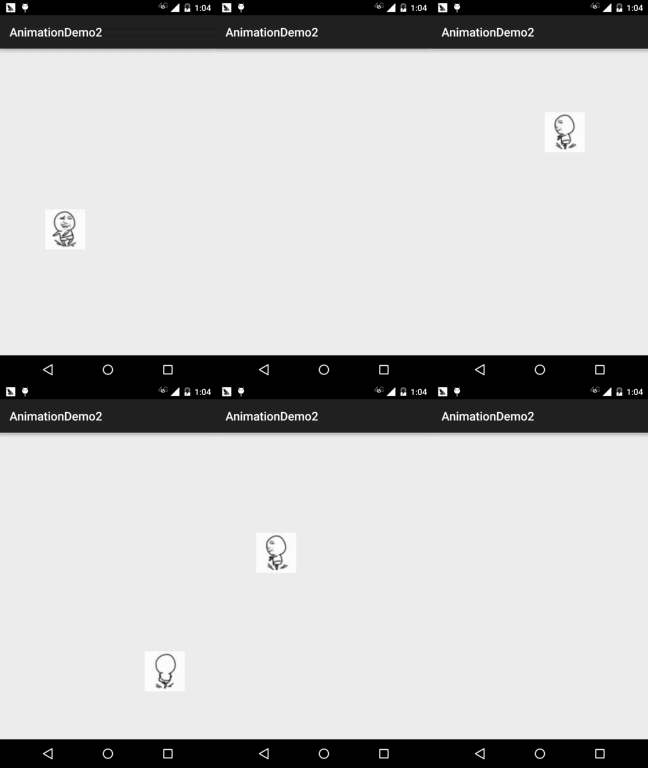
示例二:在指定地方播放帧动画
运行效果图:
代码实现:
依旧是先上我们的动画文件:anim_zhuan.xml:
<animation-list xmlns:android="http://schemas.android.com/apk/res/android"
    android:oneshot="true">
    <item
        android:drawable="@mipmap/img_zhuan1"
        android:duration="80" />
    <item
        android:drawable="@mipmap/img_zhuan2"
        android:duration="80" />
    <item
        android:drawable="@mipmap/img_zhuan3"
        android:duration="80" />
     <!--限于篇幅,省略其他item,自己补上-->
    ...
</animation-list>
接着我们来写一个自定义的ImageView:FrameView.java,这里通过反射获得当前播放的帧, 然后是否为最后一帧,是的话隐藏控件!
/**
 * Created by Jay on 2015/11/15 0015.
 */
public class FrameView extends ImageView {

    private AnimationDrawable anim;

    public FrameView(Context context) {
        super(context);
    }

    public FrameView(Context context, AttributeSet attrs) {
        super(context, attrs);
    }

    public FrameView(Context context, AttributeSet attrs, int defStyleAttr) {
        super(context, attrs, defStyleAttr);
    }

    public void setAnim(AnimationDrawable anim){
        this.anim = anim;
    }

    public void setLocation(int top,int left){
        this.setFrame(left,top,left + 200,top + 200);
    }

    @Override
    protected void onDraw(Canvas canvas) {
        try{
            //反射调用AnimationDrawable里的mCurFrame值
            Field field = AnimationDrawable.class
                    .getDeclaredField("mCurFrame");
            field.setAccessible(true);
            int curFrame = field.getInt(anim);// 获取anim动画的当前帧
            if (curFrame == anim.getNumberOfFrames() - 1)// 如果已经到了最后一帧
            {
                //让该View隐藏
                setVisibility(View.INVISIBLE);
            }
        }catch (Exception e){e.printStackTrace();}
        super.onDraw(canvas);
    }
}
最后是我们的MainActivity.java,创建一个FrameLayout,添加View,对触摸事件中按下的 事件做处理,显示控件以及开启动画~
public class MainActivity extends AppCompatActivity {

    private FrameView fView;
    private AnimationDrawable anim = null;

    @Override
    protected void onCreate(Bundle savedInstanceState) {
        super.onCreate(savedInstanceState);
        FrameLayout fly = new FrameLayout(this);
        setContentView(fly);
        fView = new FrameView(this);
        fView.setBackgroundResource(R.anim.anim_zhuan);
        fView.setVisibility(View.INVISIBLE);
        anim = (AnimationDrawable) fView.getBackground();
        fView.setAnim(anim);
        fly.addView(fView);
        fly.setOnTouchListener(new View.OnTouchListener() {
            @Override
            public boolean onTouch(View v, MotionEvent event) {
                //设置按下时才产生动画效果
                if(event.getAction() == MotionEvent.ACTION_DOWN){
                    anim.stop();
                    float x = event.getX();
                    float y = event.getY();
                    fView.setLocation((int) y - 40,(int)x-20);  //View显示的位置
                    fView.setVisibility(View.VISIBLE);
                    anim.start();    //开启动画
                }
                return false;
            }
        });
    }
}
好的,同样很简单哈~
3.本节示例代码和Gif帧提取工具下载
本节小结:
好的,本节给大家介绍了一下Android三种动画中最简单的帧动画,实际开发用的并不多 不过学多点东西,以后也多个思路嘛~好的,本节就到这里,谢谢~
本文来自投稿,不代表微盟圈立场,如若转载,请注明出处:https://www.vm7.com/a/ziyuan/118530.html


